Monday, September 24, 2012

Simon Says Stamp and Show Challenge: For the Love of Sparkle

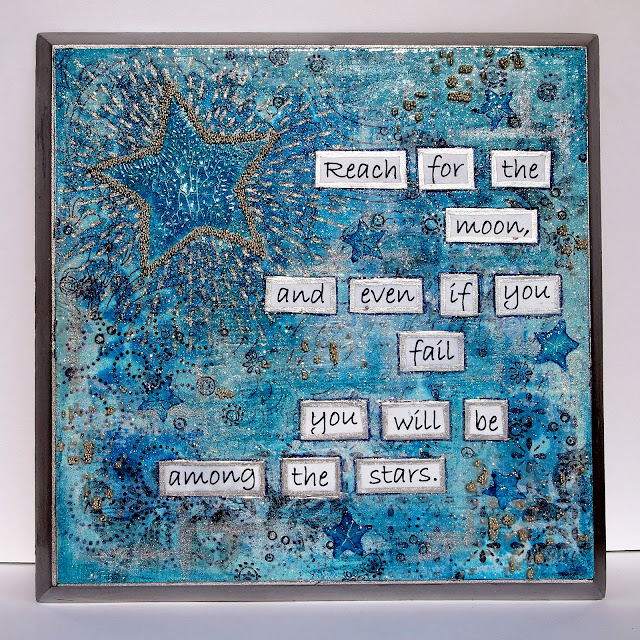
Good morning! Today I have a mini multi media board to show you for our challenge over at the Simon Says Stamp and Show Challenge Blog. When I heard the challenge was Sparkle, I immediately thought of the sparkling stars in my night sky that I am so fortunate to see almost every night if there are no clouds. One benefit of "living in the "country" :)


There are quite a few layers on this one! ...I seem to need to do that to be completely happy lol...more on this below :)


Here I started with priming a board with Gesso. Then I picked out some of my favorite Hero Arts background stamps and stamped them on tissue paper with Rangers Archival ink. I adhered them to the board with Mod Podge, applying it only on the back of the tissue paper, this keeps the paper porous and workable.
  

Here I applied a Crafter's Workshop stencil and sprayed it with Dylusions ink in two different blue colours. But I sprayed way too much and the ink bled under the stencil ooops....at this point I am a little worried!! I always think about starting over at this point :) but don't...I just put it aside for a bit and come back....guess I am too stubborn!


So I gave it a white wash of paint. I am still not loving it!!! I think I put it aside again LOL!
From this point on I just started to stencil in some stars....one large on in the corner and smaller ones around the board. Of course I had to use my favorite product at the moment to sparkle them up :).... Tim Holtz Crackle Paint :) I randomly stamped small images, and added silver pen and beads around the board. To finish it off, I computer generated a sentiment and outlined it in silver leaf pen. Here are a couple of close-ups of the finer finishing layers.


So of course the moral of this board's story is never give-up!! I am pleased with it now, but this seems to be an ongoing story with all my boards!....does anyone have this "problem"...or is it just the "journey" ? :)


I so hope you can join us over at Simon Say Stamp and Show for this For the Love of Sparkle challenge, for one lucky entrant receives a $50 dollar store voucher!!! There is a special brag blinkie also up for grabs for the top 3. I highly encourage you to check out all the DT's projects...they are truly amazing!
Have a fantastic day! Hugs, TRace


Saturday, September 22, 2012

Nature Inspired

Good morning! I just got back from four glorious days with three of my crafting girlfriends...oh how that fills my the soul with fun! We ate, drank, sang, and laughed till we cried!! LOVE that!!
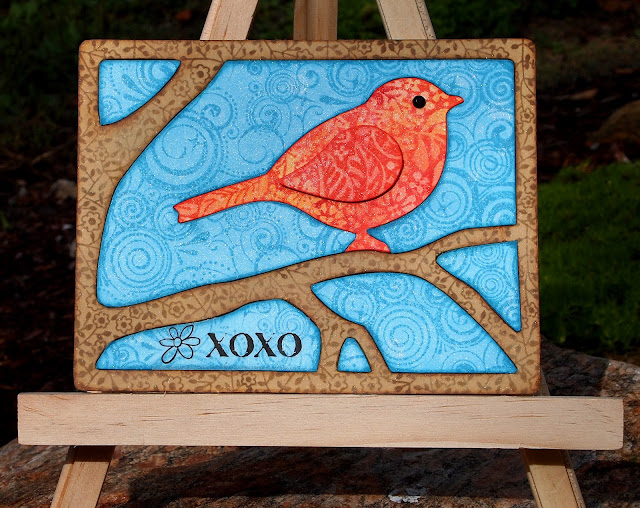
I was able to make a fast and fun mini board for the latest Impression-Obsession challenge: Nature Inspired.


I stamped three different Impression-Obsession stamps ( CC025 Tapestry 2, CC054 Swirls & Stars, and CR007 Tiny Flowers) on white Neenah paper using Tim Holtz Distress inks, and also inked in the white background with the same inks. I glued the paper to Technique Tuesday Technique Tiles and used an exacto knife to cut around the images and pop them back in like a puzzle piece :) The sentiment is a SRM sticker.

Monday, September 17, 2012

Simon Says Stamp and Show Challenge: Tape It Up

Good morning!! I'm here with my first post as the newest member on the Simon Says Stamp and Show  Design Team ...Oh HAPPY DAY:) :) :) Today I am sharing a card for the challenge of Tape It Up. I choose to make my own washi tape using some of my favorite background stamps. I will give you a little photo tutorial on the process, and you can find all the product I used at the end of the post :) Here is the card:

I have made my own washi tape before, but this time I added a little twist and embossed the ink images....I think you can see the embossing in this photo, but of course it is much prettier IRL :)

I took a sheet of Scor-tape and cut it into strips, Simon Says Stamp does sell it in different widths on the roll as well. I grabbed any tissue paper I had lying around in the house.
I start at one end and slowly pulled the brown backing off the tape as I smooth it down on the tissue paper.
Here you see I have trimmed down the tissue paper/tape somewhat before stamping it. I did pass my embossing buddy over the tissue tape so I would get an good clean embossed image. Next I applied Versamark ink onto my stamp, then you can apply any ink of your choosing over top of that and just in the area you need for the paper tape. Then I lay my paper tape to my background stamp and smooth it over with my fingers. Next lift it straight up, and sprinkle with clear embossing powder and heat. I find I get a perfectly stamped image this way almost every time. I use this method of stamping for all my large background stamps.

 Here are two stamped images...the one on the left is embossed and the right one is not. The embossing changes the colour of the ink slightly...I think a little darker. All you need to do now is trim it to whatever size you want...at least to the tape edge, peel the back off and stick down. Easy peasy :) If you have any questions, please drop me an email.


Every week Simon Say Stamp generously gives away a $50 dollar voucher to one randomly selected entry :) I can't wait to see what you create! Please come and play with us at Simon Says Stamp and Show. Hugs, TRace 


LinkWithin

Related Posts Plugin for WordPress, Blogger...